Email Administration
 

LCR will work with you to assign an email account with administration rights to the proper domain(s). If at any time, you have a question or think the interface is not giving you the right information, please ask! We have discovered some bugs in the web admin interfaces and if there are more, we need to know about them to forward them to the developers.

Go to http://mail.<yourdomain.com> This will be the domain where your admin account is in and not necessarily the same as the domain you want to administer.

 
Select Domain Management.

Domain Management uses SSL(https) to encrypt the data stream from the mail server to your PC. However it's a self signed cert, so your browser should complain. This is the first message Firefox puts up and if you select Accept the certificate permanently, you won't be pestered again. However I recommend accepting the default as shown.


Now, it should complain that you asked for https://mail.<mydomain.com>and this cert is for a different domain name. This is normal at this point. Go ahead and select OK.

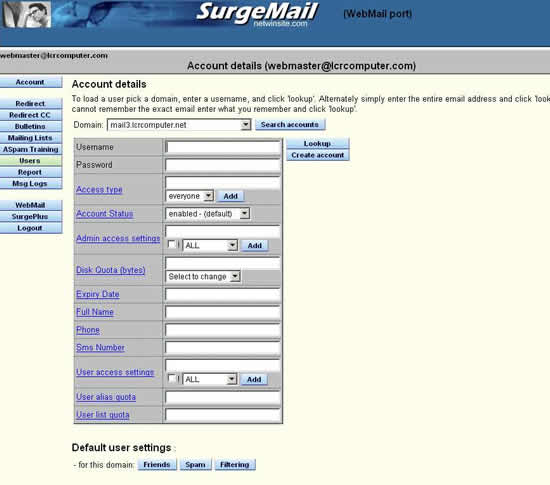
Note the white pull down selection box in the middle of the screen. Make sure this shows the domain that you want to work in. Use the down arrow to select the proper domain, if necessary.

The buttons on the left:

Users:
Most of the work you will do is after you select Users from this screen.

Bulletins:
Bulletins is a way to send a message to all users of a domain. Unfortunately, you have to have domain admin rights to use this feature and you have to use it from this menu. It would be too confusing and inconvenient for regular users to navigate here to use it.

Redirect:
The Redirect buttons here are for domain level redirection, which is called forwarders or groups in other email software. To use a redirect, two notes: Use the full email address of where the email will go and if you need to redirect to more than one email account, seperate the entries with commas, again use the full email address.

NOTE: If there is a syntax error in a redirect, Outlook and Outlook Express will give you an error message when sending to them that is not helpful to resolve the underlying problem. Try again with Thunderbird or WebMail to get a useable error message.


This screen is the one that you get to after clicking on Users. This is where you will do most of your work.

To add a new account, make sure the correct domain name is displayed in the white select box. Type in the new email address (leave off @<yourdomain.com>). Type in their password and then click on Create Account.

Some of the spam rules are not effective at this point. Go to webmail (http://mail.<yourdomain.com>) and login as that user. Create a folder called Spam (this is case sensitive.). Then all the spam rules will be applied to this user's account. See the Spam documentation for more information.

To modify an existing account, click on Search Accounts, and click on the account to modify. After selecting a specific account, the account name will be displayed in the Username box. To change their password, type in the new password next to Password and click on Save at the bottom of the page.

To delete account(s), click on Search Accounts, checkmark the account(s) to delete and then click on the Delete user(s) button.


Existing user maintenance is done from this screen after finding the account using the Search Accounts button.

To change the password, just type in the new password and click on Save User at the bottom of the page.


Usage Stats: Use the update button to accurately see the amount of disk space used. This will never be zero as there are some overhead files left after all email is deleted.

Continued.....


home | company info | web hosting | e-mail | eCommerce | WebMail